| Building my own spice rack in the FAU fablab | Created: 15.02.2012 23:01 Last modified: 08.04.2012 18:00 |
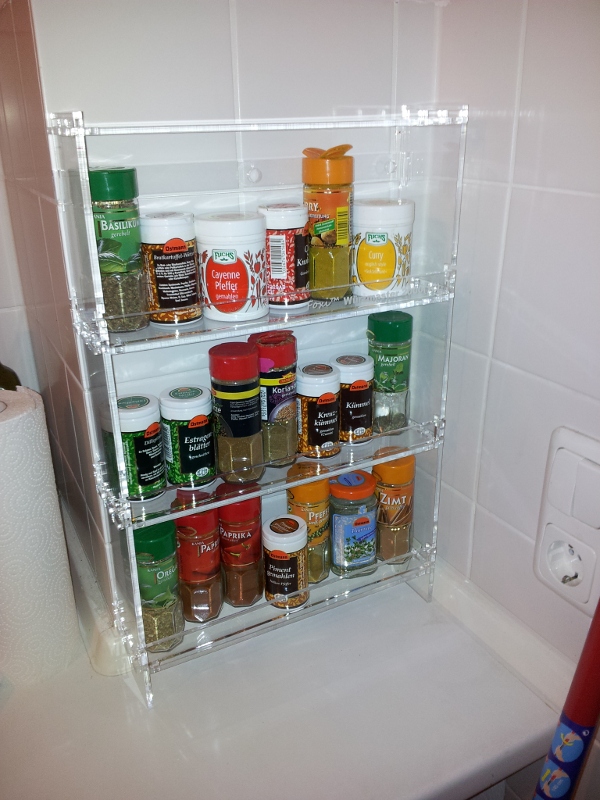
 There currently is a Fablab being established at Friedrich-Alexander-University (site is in german, see Wikipedia for an explanation of fablabs in general). Although they're not fully equipped yet, they recently got their laser cutter/engraver. Naturally, such a "toy for big boys" was something I desperately wanted to try out - but I needed a project where I could make use of it. Just doing the usual, cutting and engraving a sign out of a piece of acrylic glass and then lighting it with some LEDs, does certainly look cool, but has been done about a gazillion times already in the week since the laser was delivered. I found it too boring. After a week, I finally had the idea that I needed a spice rack, and while there are certainly better ways to build a spice rack than with parts cut out of acrylic glass, it was not a terribly bad idea. I measured the place where I wanted to put it, and then constructed it so that would exactly fit that spot. I also made the construction so that it would hold together without any glueing. While I intended to make it more stable by glueing, the basic structure would hold without any of it. 5 millimeter thick acrylic glas was to be used, as that would provide the needed stability and ease construction. Turning my construction into reality started off with a few technical difficulties: First of all, I had planned for the rack to be 4 stories and 60 centimeters high. However, the acrylic glas available in the fablab only was 50 centimers long, thus only permitting 49 centimeters of height. The top level thus had to be cut off. The second problem was the software: The lasercutter has a not-so-great windows driver, and usually "Corel Draw" is used to send data to it. I had created my design with "QCAD" (community edition), which saves files in DXF format. Importing those into Corel Draw was absolutely unproblematic. However, when sending it to the cutter, the printer driver created nonsense cuts because it only has two modes for vector sorting. The "inside out" mode (that had to be used because there were holes to be made into the parts before they were cut out) gets confused with the outer border of the part, and randomly cuts individual lines of the outer border. Luckily, corel draw has a function to combine multiple connected lines into one continuous object. That also causes them to be sent to the printer driver as one object, eliminating the problem. Of course, it would be a very useful feature for the printer driver if it could do that internally. After that, cutting the parts went pretty smooth - but problems continued during assembly: The laser currently seems to be a little misaligned, meaning that it does not do cuts through the material at an 90 degrees angle, but more like 80 degrees. Also, the acrylic plates from which I cut have a pretty high tolerance themselves: a "5 millimeters" thick plate is somewhere between 4.1 and 5.9 millimeters in reality. Both these problems meant that I needed to use a lot more force than planned and - in one case - a rasp to get the parts together. On the pro side, after finally putting the parts together, they were really stuck, making the construction rock stable. I still decided to glue the most important parts together as originally planned. I used Dichloromethane for that - it essentially melts the acryl together and should create almost perfect connections. The problem here was that I had read the german Wikipedia article on Dichloromethane - and as a result, I was very very veeeeery cautious with it. In the end, I used way too little, and my "glue points" did not hold. I decided to skip a second attempt - as mentioned, the construction was stable enough without glueing. There was one more FAIL worth mentioning: I had misconstructed the mount points for the bars at the front and the back that prevent the spices from falling out. They were 5 mm too high due to a little miscalculation. Instead of lasering the big side parts again with the mount points in the right places, I just made the bars (which I had not lasered yet) 5 mm larger so they would fit. In the files below, the .cdr file has the wrong mount points and the larger bars. In the .dxf file, the error has been corrected, so bars and mountpoints are as intended, but not as I built it. In the meantime, the spice rack is in full operation. Unfortunately, it is too small, I can't fit all my spices in due to it only having 3 instead of 4 floors. I'm still pondering ways to add the missing one. Though I had constructed a bar for screwing it to a wall, that was not done: The construction is attached to the wall only through a Tesa Power Strip that has been cut into two halves. As usual, here is a collection of stuff from the project, in the hope that some of it might be useful for others: [Photos from the construction] [Corel Draw file - this contains what was actually built] [QCAD / .dxf file - what was originally planned] |
|
|
no comments yet write a new comment:
|
|